How to add or modify a centre in TMH Suite
Need to create, edit, manage, or update a centre or service location? In TMH Suite, you can easily do this from your account. Here’s a step-by-step guide:
Step 1: Access your centres settings
- From the left menu, click on “Manage your account”.
- Then select “My Business”.
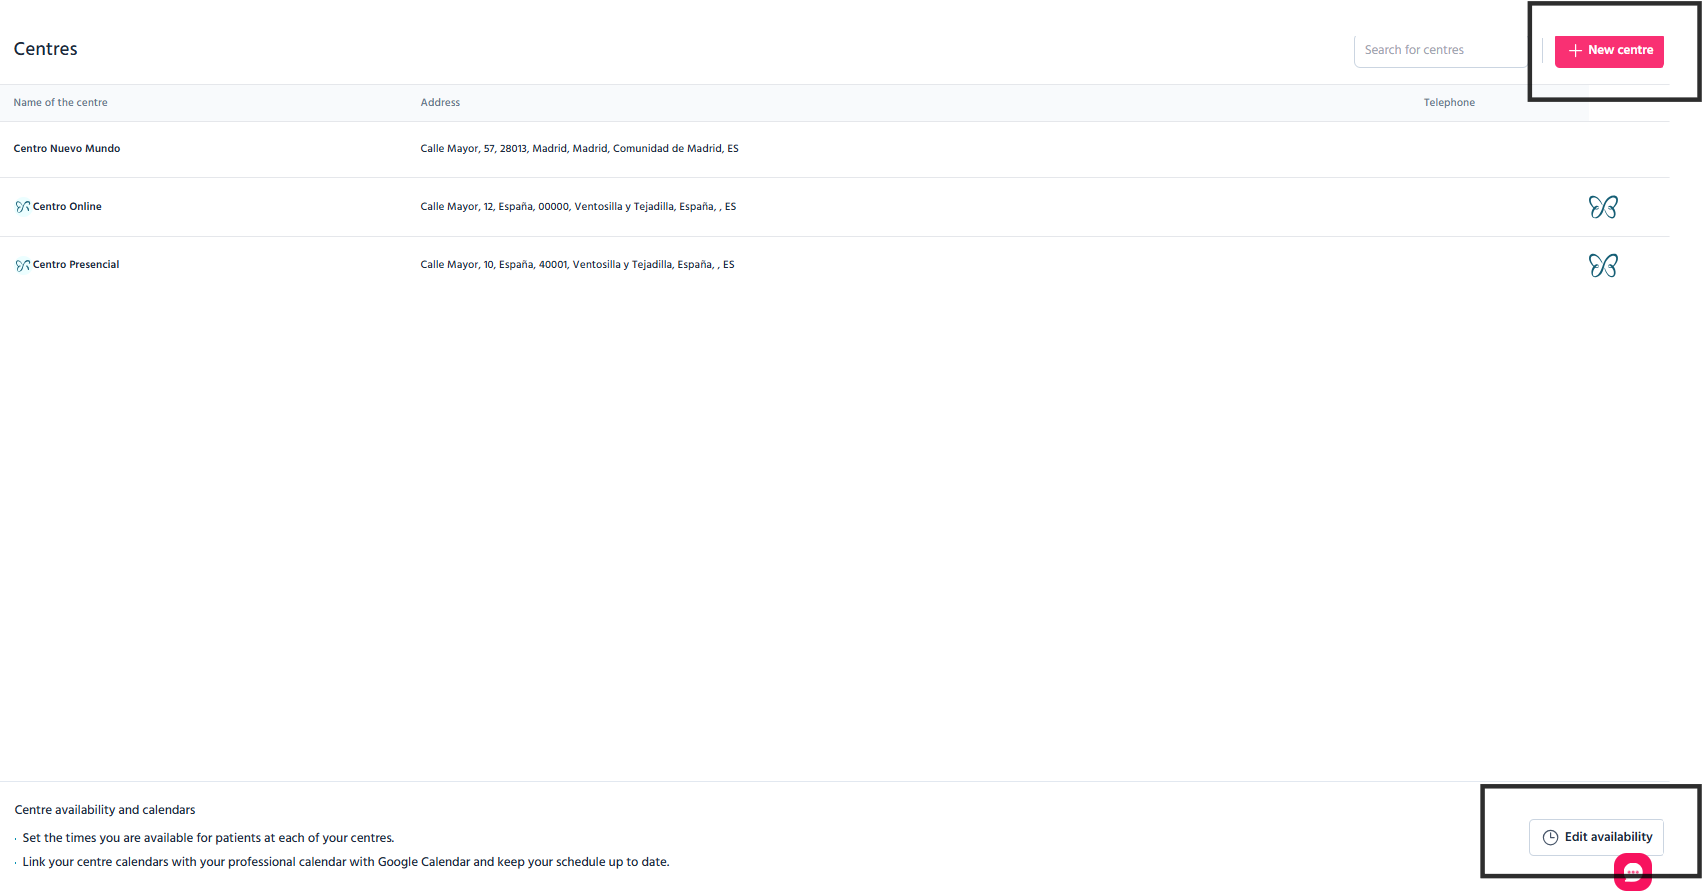
- In this section, go to “Centres”.

Step 2: Add or modify a centre
To edit an existing centre:
- You’ll see a list of already configured locations.
- Click on the centre you want to modify.
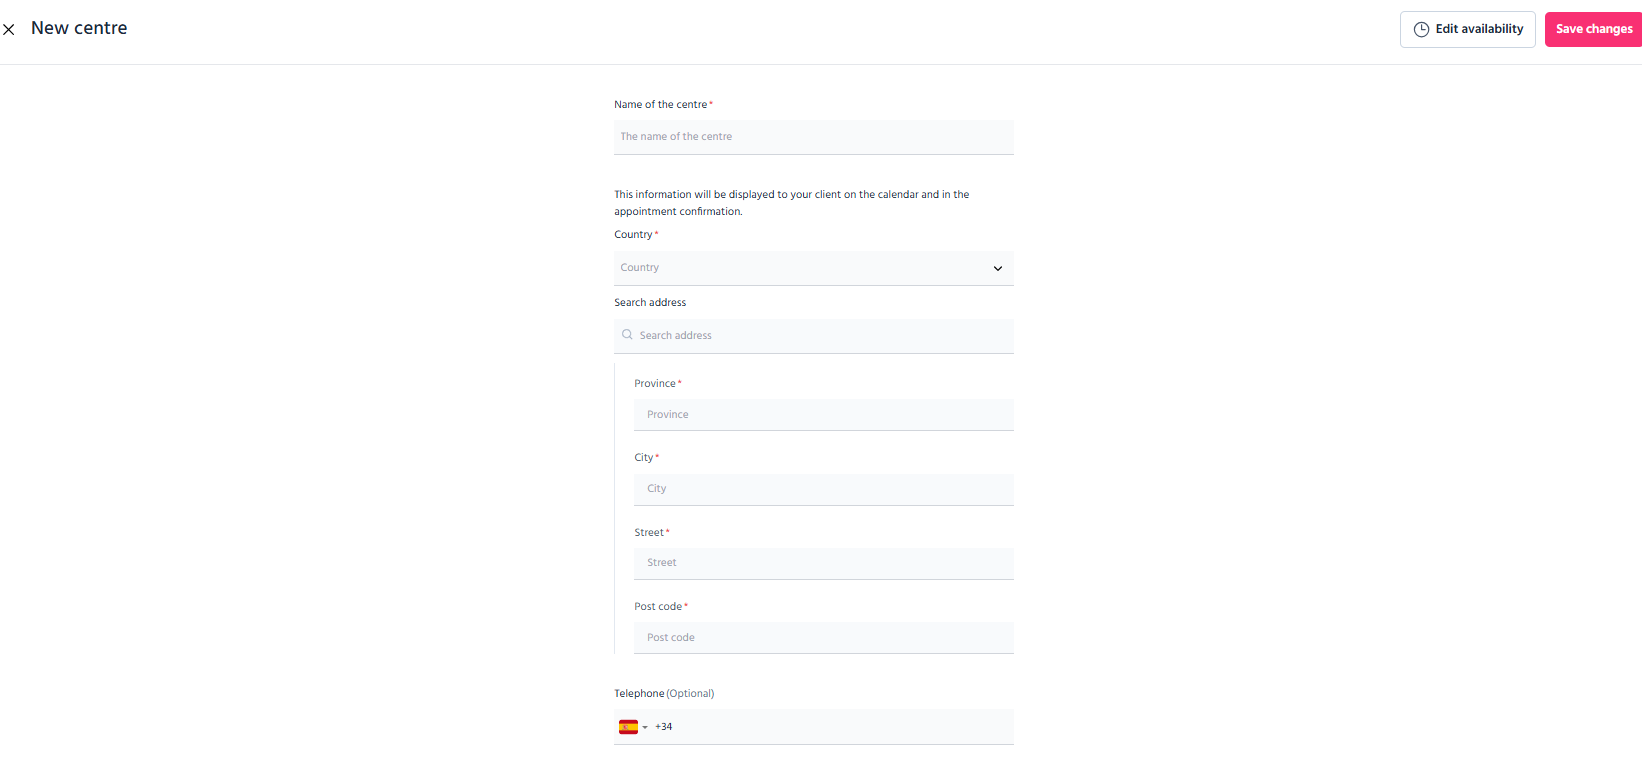
- You can then edit the information (name, address, contact details, etc.).
To add a new centre:
- Click “New centre” at the top right.
- Complete all the required fields (centre name, address, phone number, etc.).

Step 3: Edit opening hours
- From “Set up Schedule”, you can set or change the opening hours for each centre.
- You can update these as often as needed.
- This allows you to keep your real availability up to date.
Step 4: Assign the centre’s services
- After creating or editing the centre, go to the “Services” section.
- Make sure to assign the services available at that specific location.
⚠️ This is essential so patients can correctly book according to the place and type of appointment.
Step 5: Sync with Google Calendar (optional)
- If you want to connect your new centre to Google Calendar, go to “Set up Schedule”.
- Here you can connect your Google account so the centre’s appointments sync automatically.
And that’s it!
With these steps, you can have one or several centres properly set up and ready to receive patients through TMH Suite.
